Capturing the perfect portrait isn’t just about pointing a camera and clicking a button—it’s an art that combines creativity, technique, and a keen eye for detail. I’ve always believed that the magic of a great portrait lies in the balance of posing, lighting, and framing. These elements work together to highlight the subject’s personality while creating a visually stunning image.
Understanding Portrait Perfection
Achieving portrait perfection involves aligning multiple technical and artistic elements. Posing determines how the subject’s personality and emotions translate to the image. Subtle adjustments in posture, facial expressions, or hand placements impact the overall visual narrative. For instance, a relaxed pose conveys approachability, while a strong, upright stance exudes confidence.
Lighting defines the mood and depth of a portrait. Harnessing natural light, like the soft glow during golden hour, creates warmth and dimension. On the other hand, artificial setups enable precise control over shadows and highlights. For example, Rembrandt lighting forms a distinct triangle of light on one cheek, adding drama to portraits.
Framing enhances composition by guiding the viewer’s eye to the subject. Strategic use of the rule of thirds creates balanced, engaging visuals. Tight, centered frames focus on the subject’s details, while wide frames highlight the environment for contextual storytelling. These adjustments ensure every portrait feels purposeful.
Mastering Posing Techniques
Posing dictates how a subject’s personality, emotions, and physical features are captured. Understanding effective techniques ensures that portraits stand out and effectively communicate the intended message.
Posing Dos and Don’ts
Directing poses involves balancing creativity with comfort. I recommend ensuring the subject maintains good posture by keeping their back straight and shoulders relaxed to project confidence. Encourage angles rather than symmetry; for example, slightly tilting the head adds depth and reduces unflattering shadow lines. Pay attention to hands, as awkward placements can distract from the overall image.
Avoid overcomplicating poses, as stiff positions can diminish authenticity. Refrain from forcing expressions, which can feel unnatural. Instead, guide the subject toward fluid, subtle movements for seamless results.
Creating Natural and Relaxed Poses
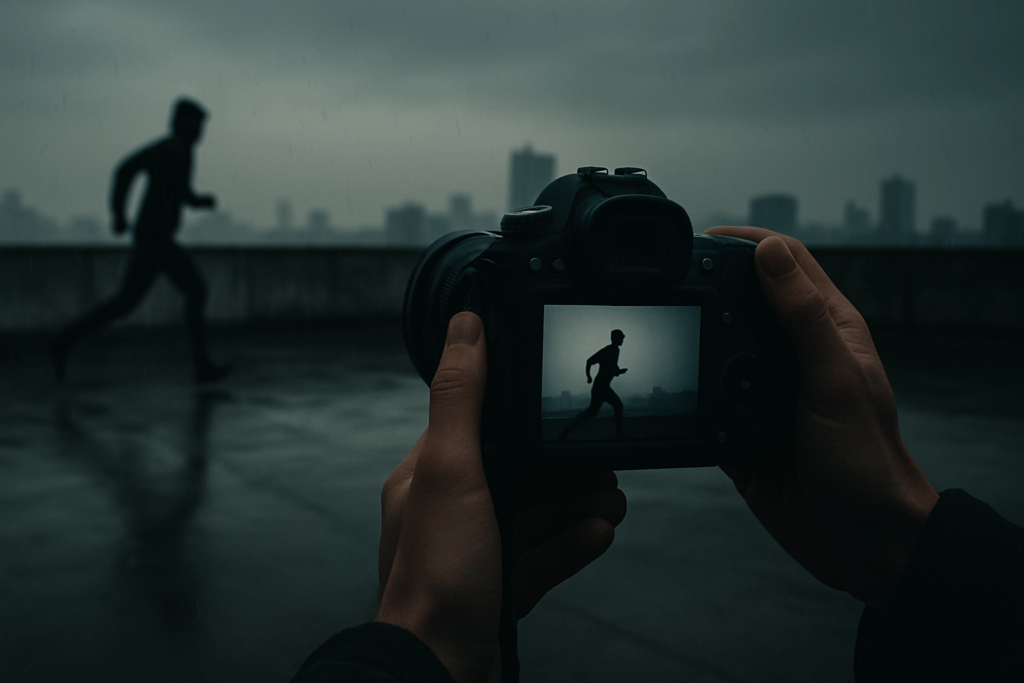
Natural results come from fostering an environment of ease. I initiate conversation or use prompts to help the subject stay candid. Suggest active poses, such as:
- leaning slightly forward
- walking mid-step
- adjusting clothing
to keep the body engaged while avoiding rigidity. While directing, I allow pauses instead of shooting continuously, giving the subject brief moments to breathe and reposition comfortably. This approach encourages more spontaneous and relaxed outcomes.
Enhancing Emotion and Expression
Genuine emotions elevate any portrait. I focus on connecting with the subject by discussing their favorite memories or sharing humor when facilitating expressions like joy or wonder. For intensity, I guide them to engage with their surroundings, like staring into the distance or making direct eye contact with the lens.
Subtle shifts in facial expressions, such as soft smiles or pensive glances, convey nuanced emotions. I avoid overemphasizing large expressions, as exaggerated results rarely match the portrait’s tone.
The Art of Lighting
Lighting shapes the mood, depth, and texture of every portrait. Mastering its nuances ensures that the subject’s features are highlighted and the visual narrative is compelling.
Choosing the Right Light Source
I focus on selecting light sources based on the desired effect. Soft, diffused light creates a flattering and natural look by minimizing harsh shadows. Direct, hard light emphasizes textures and creates drama, making it ideal for bold, creative shots. Continuous light sources, such as LED panels, provide consistent illumination for precise control, while strobes are perfect for capturing dynamic poses.
Utilizing Natural and Artificial Light
I balance natural and artificial light depending on availability and purpose. Natural light, like soft morning or golden hour sunlight, adds warmth and dimension. For overcast days, softer shadows enhance evenness, while bright midday sunlight can be diffused with reflectors to soften harshness. Artificial light setups provide adaptability; for instance, using ring lights for even illumination in close-ups or adjusting studio lights to control shadow direction and intensity.
Playing with Shadows and Highlights
I use shadows and highlights to create depth and mood in portraits. Low-key lighting, achieved with minimal light, emphasizes rich shadows for dramatic compositions, while high-key lighting reduces contrast for bright, cheerful images. Rim lighting outlines the subject, separating them from the background, while split lighting adds mystery by dividing the face into light and shadow. Carefully managing highlight placement prevents overexposure and draws attention to focal points.
Perfecting the Framing
Framing determines how attention is directed to your subject, creating a visual hierarchy in the portrait. Effective framing ensures the viewer’s focus aligns with the intended storytelling.
Rule of Thirds for Portraits
Using the rule of thirds adds balance and visual interest to portraits. I align the subject’s eyes or key features along one of the vertical or horizontal lines to guide the viewer’s focus naturally. Placing the subject slightly off-center often avoids static compositions. For example, I position the subject’s face along the upper third for a more engaging image. In tighter crops, I place the eyes directly on the upper horizontal line for strong visual balance.
Backgrounds That Complement Your Subject
Background selection enhances the subject without distractions. I choose unobtrusive or blurred settings for minimal interference, especially with shallow depth of field. Neutral colors or textures, such as brick walls or soft foliage, often work best for harmony. However, I also experiment with contrasting backdrops when looking to inject more energy. For instance, vibrant murals can create dynamic visual tension with a posed subject. My primary focus is keeping the subject as the clear visual anchor.
Angles and Perspectives for Dynamic Composition
Changing angles adds depth and drama to portraits. I experiment with high angles for softer, approachable looks and low angles to emphasize strength or dominance. Shooting from the subject’s eye level delivers a natural feel. Beyond vertical and horizontal shifts, I adjust the tilt of my frame slightly for creative, diagonal compositions. For example, an over-the-shoulder shot captures subtle emotions or environmental context while breaking away from straightforward framing.
Tips for Consistent Portrait Success
1. Plan Composition Before Shooting
I ensure my vision is clear by pre-visualizing the scene and considering posing, framing, and lighting in advance. Using tools like a shot list or sketching ideas saves time and reduces guesswork during the shoot.
2. Adapt to Your Subject’s Energy
I match my approach to the subject’s mood, whether they’re confident or reserved. Creating a relaxed environment produces natural poses and genuine expressions, essential for vibrant portraits.
3. Prioritize Natural Connections
I encourage interaction with the environment or a prop to keep subjects engaged and comfortable. For example, asking someone to adjust their jacket or lean on a chair adds context and authenticity to the shot.
4. Refine Your Lighting Setup
I position light to complement the subject’s features, avoiding flat or overpowering effects. For indoor settings, I combine key and fill lights to balance shadows, while outdoor sessions benefit from strategic placements during golden hour.
5. Experiment with Angles and Heights
I move around the subject to find unique perspectives. Shooting from a lower angle emphasizes strength, while a higher viewpoint creates vulnerability, each influencing the story told by the portrait.
6. Simplify Your Background
I choose clean, uncluttered backgrounds to keep the focus on the subject. For instance, neutral walls or natural landscapes work well without drawing attention away from facial expressions.
7. Practice Consistent Editing Techniques
I maintain a cohesive style by developing presets for color grading, brightness, and contrast adjustments. Consistency across images enhances a professional look and builds trust with clients.