Retouching photos can feel like walking a fine line between enhancing beauty and overediting. I’ve spent countless hours perfecting the art of subtle edits, and I’ve learned that the Healing Brush is one of the most powerful tools for achieving natural-looking results. Whether you’re smoothing skin, removing blemishes, or fixing tiny imperfections, mastering this tool can completely transform your workflow.
Understanding The Healing Brush Tool
The Healing Brush tool is essential for retouching photos while maintaining a natural appearance. It efficiently removes imperfections, blending corrections seamlessly into the surrounding pixels.
What Is The Healing Brush Tool?
The Healing Brush tool is a retouching feature in software like Adobe Photoshop. It enables users to address imperfections by sampling a clean area of an image and applying it to flawed regions. Unlike simple cloning, it matches texture, lighting, and shading, ensuring uniformity in adjustments. This tool suits tasks like smoothing wrinkles, eliminating blemishes, and repairing damaged areas in photos.
Key Features And Functionalities
- Texture Matching: The tool blends sampled pixels with the target area by preserving the original texture and shading.
- Custom Brush Settings: Adjustable size, hardness, and spacing allow fine control for precision work.
- Sample Source Selection: Options to sample from the same layer, a different layer, or a merged canvas enhance flexibility.
- Non-Destructive Editing: When used on separate layers, this tool ensures edits don’t alter the original image.
These features make the Healing Brush indispensable for achieving professional-quality retouching with natural-looking results.
Preparing Your Canvas For Retouching
Effective retouching begins with a well-prepared canvas. Establishing proper settings and understanding the image’s needs ensures seamless edits.
Setting Up Your Workspace
- I organize my workspace to maximize efficiency and accuracy.
- Starting with a high-resolution image allows for detailed retouching without sacrificing quality.
- I enable non-destructive editing by creating duplicate layers, maintaining the original image intact.
- Customizing brush settings optimizes performance.
- I adjust the size and hardness to suit the image details, ensuring precision.
- Enabling the “Sample All Layers” option in tools like Photoshop ensures edits blend seamlessly while keeping adjustment layers active.
Identifying Areas That Need Correction
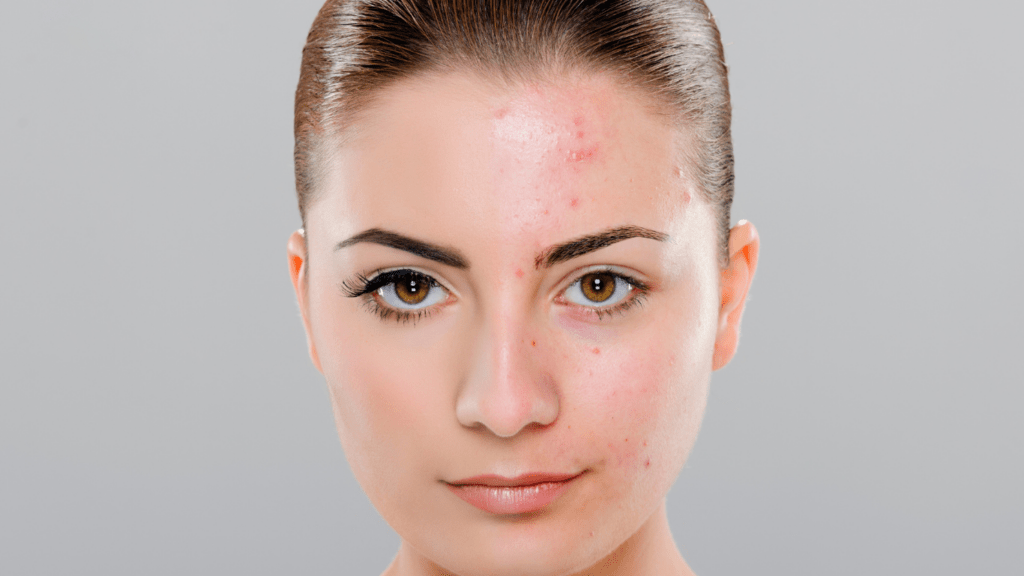
I closely examine the image to locate imperfections requiring attention. Common areas include blemishes, uneven skin tone, and stray hairs. Zooming in on problem areas helps me assess how they impact the overall balance of the image.
I consider lighting and texture consistency when planning corrections. Any adjustments should match the surrounding areas to maintain a natural look, avoiding any noticeable distortions.
Techniques For Using The Healing Brush

Using the Healing Brush effectively guarantees precise and natural retouching. By mastering specific techniques, I achieve flawless results that enhance images without detectable edits.
Spot Healing For Small Imperfections
I rely on spot healing to correct minor flaws like:
- acne spots
- dust
- stray hairs
Keeping the brush size slightly larger than the imperfection ensures accuracy. I sample clean areas near the flaw, preserving texture consistency. For better control, zooming in helps avoid accidental adjustments to surrounding areas. Maintaining a light touch prevents over-editing, retaining a natural look.
Seamless Blending For Larger Edits
When addressing larger imperfections, such as wrinkles or uneven backgrounds, I use a soft-edged brush and adjust its hardness as needed. Sampling from multiple areas prevents visible patterns and maintains a smooth transition. I apply blending in small sections, closely matching the surrounding texture and lighting. Layer masks are essential to refine edits and revert any overcorrection.
Managing Difficult Textures And Patterns
For intricate textures or repeating patterns, selecting sample sources carefully avoids distortion. I align the sampled area carefully with the image’s design to maintain harmony. When working with detailed fabrics or textured surfaces, I frequently adjust brush size and hardness to ensure precision. Adding small adjustments gradually avoids disruption to the design or texture.
Tips For Achieving Natural-Looking Results
Achieving natural-looking results with the Healing Brush involves thoughtful techniques. I focus on balance and accuracy when retouching to enhance images without making edits noticeable.
Maintaining Consistency In Edits
I always ensure uniformity in retouching. To match textures and tones, I sample from areas close to the imperfection, adjusting the brush size if needed. Lighting consistency is key—I study how shadows and highlights interact in the image before making edits. For larger areas, I sometimes use multiple sample points to avoid mismatched patterns.
Avoiding Over-Retouching
I set limits to my edits to keep changes subtle and realistic. Signs like overly smooth skin or erased character lines can make retouching appear fake. Instead, I preserve natural features by targeting only blemishes, discoloration, or distractions. Using a lower opacity brush helps me introduce corrections gradually, blending them seamlessly.
Leveraging Layer Techniques
Working on non-destructive layers allows me to make adjustments without compromising the original image. I use one layer for corrections and additional layers for testing. By toggling visibility, I can compare the before and after versions, ensuring my edits enhance the image rather than overpower it. This approach also simplifies reverting specific changes, saving time on revisions.


