Photography’s more than just capturing moments—it’s about telling a story, evoking emotion, and creating something visually stunning. But let’s face it, even the best shots can sometimes feel a little flat straight out of the camera. That’s where Lightroom presets come in, offering a quick and powerful way to transform your photos with just one click.
Why Use Lightroom Presets?
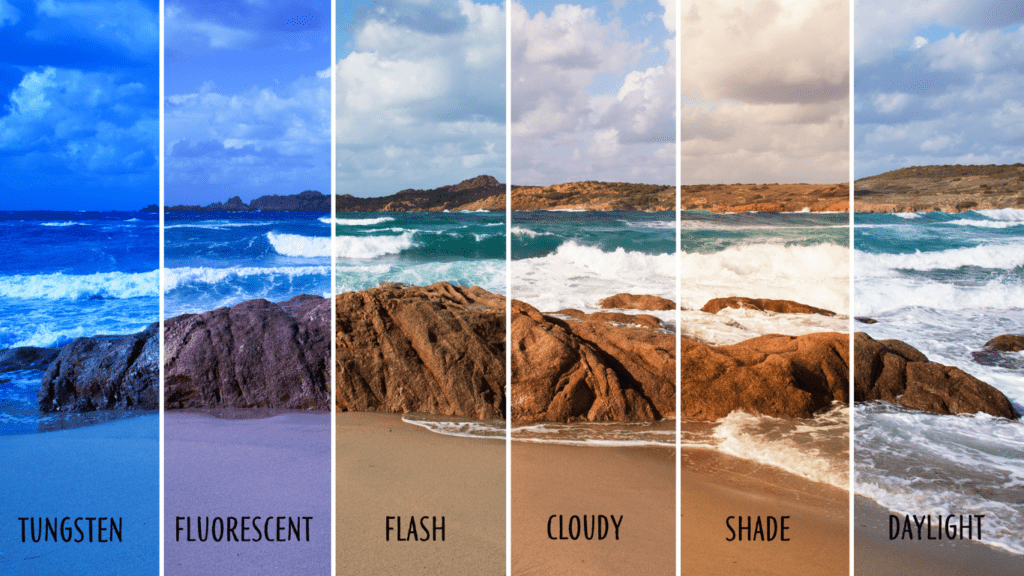
Lightroom presets streamline the editing process by applying pre-defined adjustments to photos. These adjustments can include tweaks to exposure, contrast, saturation, and color tones. Using presets saves time compared to manual editing, especially when working on multiple images.
Presets ensure consistency across a photo series or portfolio. For example, wedding photographers can use presets to maintain the same color grading throughout an entire album. This cohesive look enhances professionalism and brand identity.
They make advanced editing techniques more accessible. Custom-made presets created by professionals often incorporate complex color grading or creative effects. Even users with limited editing experience can achieve high-quality results simply by applying these presets.
Presets reduce decision fatigue during editing. Choosing from numerous manual settings can feel overwhelming, but presets provide an instant starting point. Editable after application, they allow further refinement if needed.
Their versatility supports various photography styles. Whether it’s landscape, portrait, or urban photography, presets can help achieve aesthetic goals. For instance, muted tones for landscapes or vibrant hues for travel photography enhance visual appeal.
How to Choose the Right Presets for Your Style
Selecting Lightroom presets that align with your creative vision depends on your photography genre and personal preferences. Identifying these factors ensures that the presets amplify rather than overshadow your unique style.
1. Consider your Photography Genre
Matching presets to your genre enhances their effectiveness. Landscape photographers benefit from presets emphasizing clarity and vibrant tones, while portrait photographers often prefer ones that soften skin tones and enhance color grading.
2. Evaluate Color Preferences
Focus on presets with tones that complement your style. Warm-toned presets work well with golden-hour shots, while cooler presets suit urban or minimalist imagery.
3. Look for Versatility
Choosing presets adaptable to various lighting conditions and subjects adds flexibility. For instance, presets with adjustable settings can cater to high-contrast scenes, overexposed skies, or shadow-heavy compositions.
4. Analyze the Before-and-After Examples
Preview the transformation that presets deliver by viewing example edits. This helps assess whether they achieve the desired look for your photos.
5. Prioritize Customization Options
Select presets that allow manual adjustment. Tweaking individual elements like exposure, contrast, or saturation ensures the final edit fits your vision.
6. Read User Reviews and Descriptions
User feedback and descriptions provide insight into a preset’s quality and usability. Reviews reveal compatibility and performance with different camera models or photo styles.
7. Test Both Free and Paid Options
Experimenting with free presets first offers risk-free opportunities to discover what works for your aesthetic. Explore paid presets only after identifying specific needs for advanced edits.
Top 10 Lightroom Presets to Instantly Elevate Your Photos

Lightroom presets bring a polished feel to photos with minimal effort. Here’s my curated list of the top 10 presets to transform your images and fit various styles and aesthetics.
1. Clean and Crisp
Clean and crisp presets enhance clarity and precision. They reduce noise, emphasize sharp details, and add subtle contrast for a professional look. These work well for urban photography, product shots, and lifestyle images requiring a clean finish.
2. Vintage Vibes
Vintage presets replicate the nostalgic look of film photography. They focus on faded colors, warm tones, and soft contrasts to create timeless aesthetics. I use these for weddings or events when I want to evoke emotion and a sense of the past.
3. Moody Tones
Moody tone presets create depth and drama. They lower highlights, deepen shadows, and enhance a darker color story. These suit portrait and landscape photography, especially in low light or overcast settings.
4. Bold and Vibrant Colors
Bold and vibrant presets enhance saturation and color vibrancy. They make bright tones pop while maintaining balance across the color spectrum. I find these ideal for fashion, food, or tropical travel images.
5. Film-Inspired Presets
Film-inspired presets mimic classic film stock like Kodak Portra or Fujifilm. They focus on soft colors, grainy textures, and tonal balance. These presets are versatile and suitable for portraits, street photography, and editorial images.
6. Black and White Classics
Classic black and white presets emphasize tonal contrast and texture. They strip away color distractions, highlighting composition and emotion. I use these for fine art photography or moments that need a timeless touch.
7. Golden Hour Glow
Golden hour presets replicate the soft, warm lighting of sunrise or sunset. They enhance warm tones, natural highlights, and soft shadows. These work best for outdoor portraits, engagement shoots, and nature photography.
8. Natural and Minimal Edits
Natural presets refine photos without overpowering edits. They subtly improve light, color, and sharpness, maintaining an organic look. These are my go-to for professional headshots or neutral, everyday photos.
9. Portrait Perfection
Portrait presets enhance skin tones, soften textures, and adjust colors for flattering results. They prioritize subject detail while keeping backgrounds subtle. I use these for close-up portraits and wedding shoots.
10. Travel and Landscape Highlights
Travel presets amplify landscapes by enhancing dynamic range and vibrant colors. They increase clarity in details like skies or water while controlling highlights and shadows. I rely on these for travel blogs and outdoor adventure shots.


